crossgeared.com

Archive for January, 2010

Burley Encore

Friday, January 29th, 2010

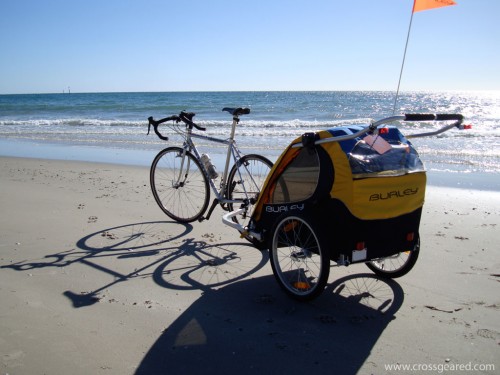
We recently added a Burley Encore to our armament of baby goods.  What is it?  Well, the Encore is a two-child bicycle trailer that falls somewhere in the middle of Burley’s range of child trailers.  In case you’re wondering, they also have a line of bicycle trailers to tow your dog or cat, or take them skiing (I’m not kidding).

First impressions are that the trailer appears to be quite well made.  The fabric and stitching looks very durable, the aluminum frame folds easily and locks securely in the ‘open’ position.  The seat and belts look comfortable, although I wasn’t able to personally test them.  Additionally, the tinted side windows and large front and rear mesh for ventilation are a nice feature for warm and sunny South Australian summer days.  The Encore also includes a zip-down rain cover for the less warm and considerably wetter South Australian winters.

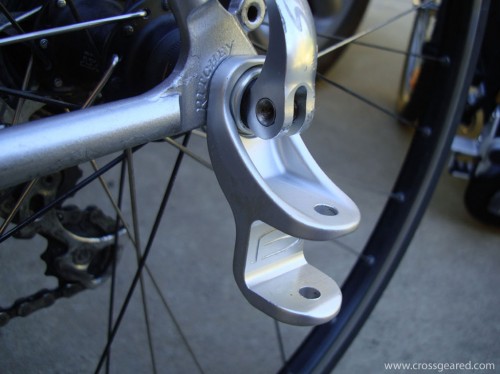
The Encore’s hitch is very well designed.  Like other Burley trailers, the hitch mounts to the bike through the rear axle/skewer, and the trailer is attached to the bike with an easy to use pin.  The design allows the bike to lean while keeping the trailer level, and stays well clear of the rear wheel.  That last point is an important one for me.  The first trailer I towed with the Gunnar was borrowed from a friend, and had a hitch that attached to the left chainstay.  In addition to marring the paint, the hitch rotated into the rear wheel and bent eight spokes.  The touch-up paint on the rear dropout is from the borrowed trailer.

The Encore pulls and tracks well. The wheels and bearings roll well, and the tires offer what appears to be a decent ride for ~10kg inflated to 25-30psi.  The trailer width has not been an issue while riding in bike lanes, or on bike paths.

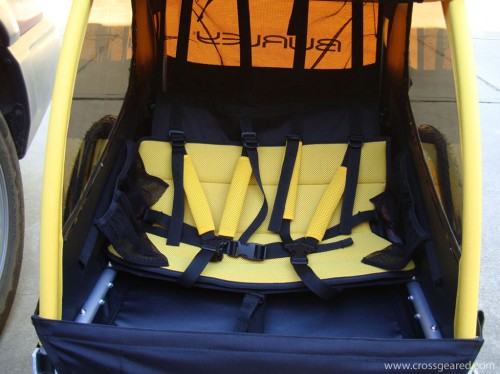
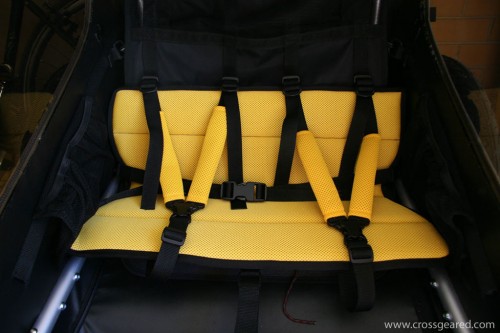
Even though the first few rides have gone well, I have had to make some changes.  First, the seat was already sagging under a light load.  Even without a load, it is clear that the seat is going to need some work.  As you can probably see, the seat back and base are only supported at the outer edges.  The result is that the middle of the seat back collapses into the ‘helmet pocket’.

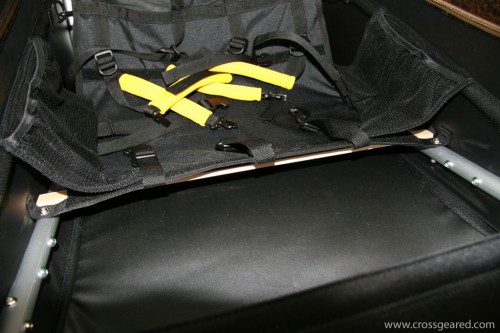
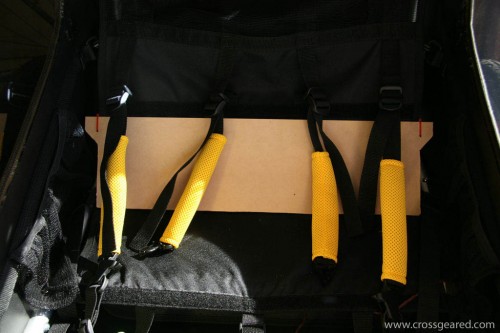
To fix the sagging seat, I added a wooden bow spanning the frame rails under the front edge of the seat base.  I also added a bow to the top of the seat back, clamping around the nylon seat back and tied to a small piece of MDF cut to match the seat back contour.  The seat base no longer sags. The seat back is now fully supported by the panel and outer straps, as a result, the ‘helmet pocket’ in the back of the seat actually works.  I’ve also added a ~1/4″ thick stiff foam rubber mat between the seat base and cushion, although I may remove it as it is probably not necessary.  Both wooden bows are under the foam seat cushion, and our passenger seem to like my changes. The seat back panel has the added advantage of keeping the cargo from poking passengers in the back.

None of the changes modified any existing part of the trailer, so I can revise my additions if necessary.  Also, none of the modifications interfere with folding the trailer, so they do not have to be removed for storage.

Here are some detail photos of the seat modifications:

The front bow test fit

The seat back panel and bow (the bow is behind the nylon seat and top edge of the panel, not visible)

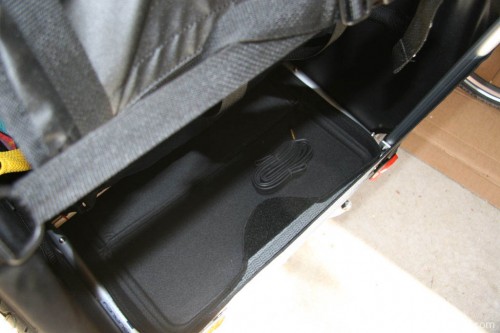
In addition to the seat modifications, I added a cargo mat.  The rear cargo area of the trailer has a relatively thin nylon floor.  I added this re-purposed car seat mat, which happen to fit perfectly.  As you can see, it easily accommodates a spare tube.

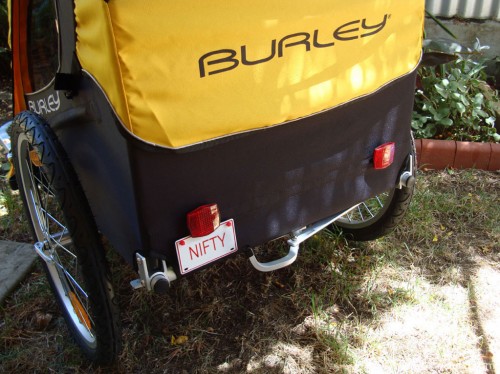
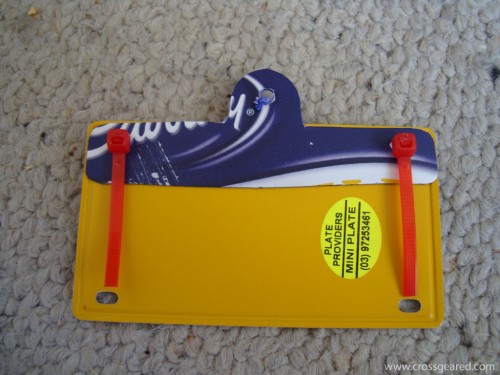
The final addition isn’t functional, but it is important.  Don’t bother looking-up the plate, this is photoshopped (yet another new verb…), but still quite nifty in its original unaltered form.

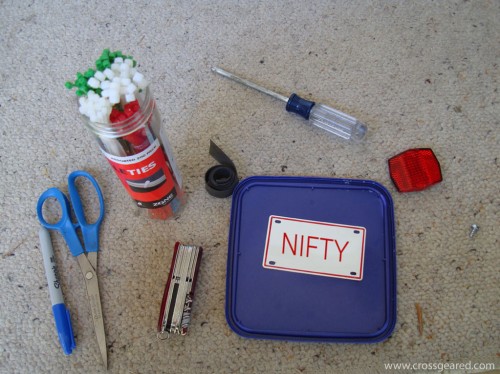
To make your own plate bracket, start with a plate, a plastic ice cream container lid, and some zip ties.

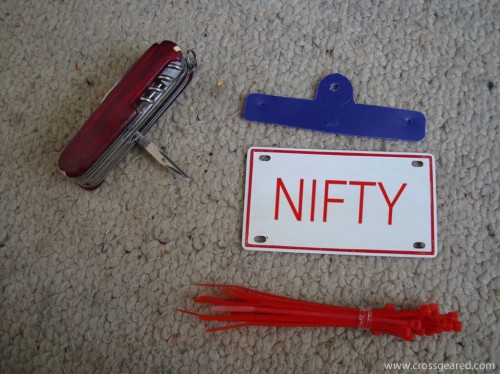
Cut a bracket from the lid, and attach the plate to the bracket with the zip ties.

I left some of the excess zip tie on the back to keep the metal plate from contacting the back of the trailer.
UK-14’er: Disc Brake Upgrade

Wednesday, January 27th, 2010

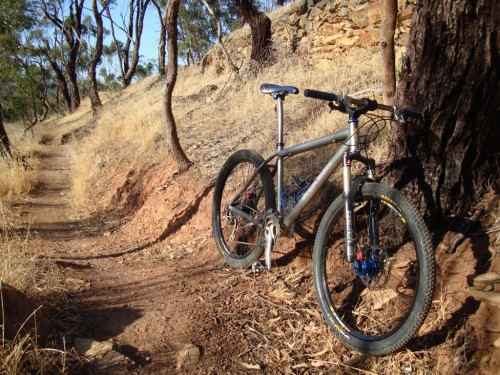
If you read the last post about the UK-14’er, you’ll know that I’m done with my Paul’s Motolite brakes.  And, if you look at the photo above, you’ll see that the UK-14’er no longer has Paul’s Motolite brakes.

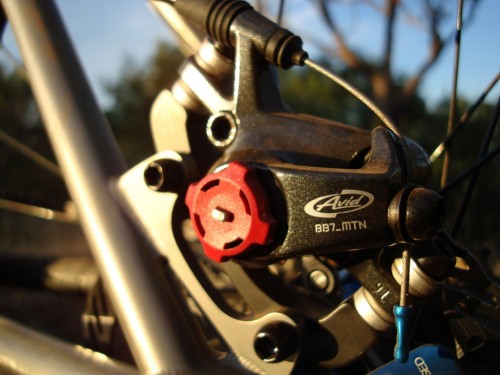
As luck would have it, Eric sent me some BB7 disc brakes.  Apparently, he was very impressed with the BB7s on his Turner Burner and wanted to share.  Or, perhaps he was tired of my endless emails about nearly every disc brake system available.  Whatever the case, his timing was good as I was getting quite fed up with the Motolites.

The BB7 is a mechanical disc brake, as opposed to hydraulic, so it is simple, and more likely to be reliable.  On the downside, BB7s are slightly heavier than most hydraulic brakes, and significantly heavier than the Motolotes.

If you’ve been around mountain biking or mountain bikers much in the past decade or so, you would have likely heard an argument or two regarding hydraulic and mechanical disc brakes.  Here is my stance:  hydraulic disc brake systems generally get redesigned and dramatically changed every couple years.  The BB7 has been around in a largely unchanged state since 1999.  This tells me that the bicycle hydraulic brake (even over a decade into its existence) is still in the early stages of development.  In contrast, the BB7, widely viewed as ‘The’ mechanical disc brake, has only seen minor updates and is a mature technology and product.  I almost convinced myself to get some XT or Elixir CR brakes, but I didn’t see either option ending well.  But, my indecision was no longer a problem when the BB7s arrive on my doorstep.

Anyway, back to the upgrade.

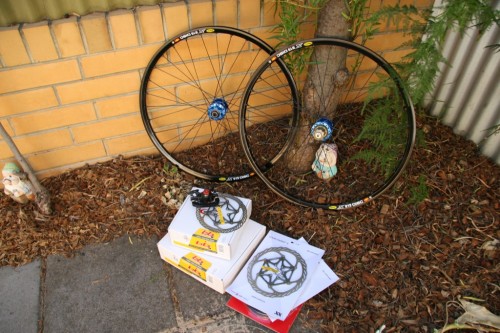
First, the brakes:

  • Avid BB7 disc brakes (front & rear)
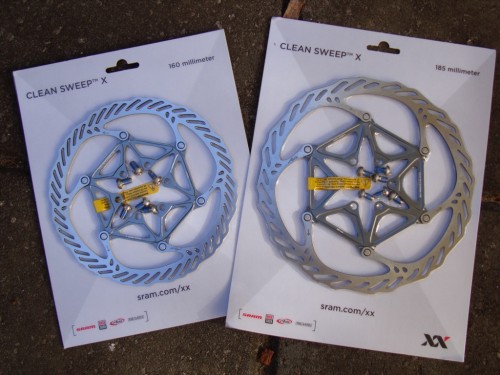
  • Avid Cleansweep X rotors, Ti bolts (185mm front, 160mm rear)
  • Avid Straight Jacket brake cable set (full length housing)

Next, the old Mavic Crossmax XL and ST wheels were not disc-compatible, so here is the new custom wheelset from Chain Reaction Cycles:

  • Hope Pro II 32h hubs
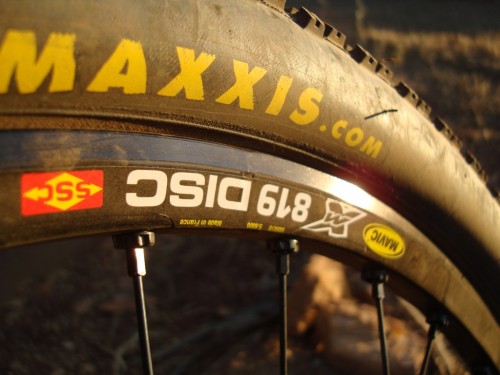
  • Mavic XM819 Disc UST rims
  • DT Swiss Competition 2.0/1.8mm spokes
  • DT Swiss Pro-lock nipples

That only leaves us with what was removed.  Again, another list:

  • Paul’s Motolite brakes (front & rear)
  • V-brake bosses (front & rear)
  • Old brake housing and cables
  • Mavic Crossmax XL wheel (front)
  • Mavic Crossmax ST wheel (rear)

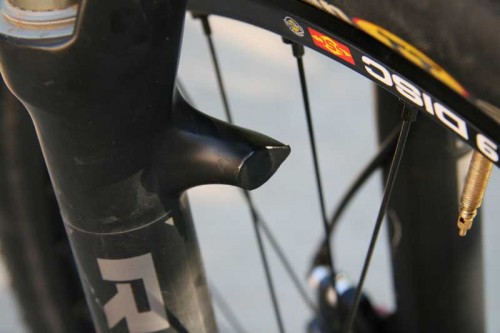
The v-brake boss removal from the frame and fork was much easier than expected.  Both bosses came out easily with the help of a very short 8mm open-ended wrench.  I’ve read reports of very stubborn brake bosses whose removal required heroic efforts.  Luckily, in my case all of the bosses came out with minimal effort.  I left the frame bosses empty, and covered the fork bosses with black vinyl electrical tape.

The BB7s and Straight Jacket cables are fairly standard.  The cable housings are run full-length, front and rear, and the BB7s are using the standard ‘sintered’ brake pads and mounting hardware. The cable install is very simple, and as with v-brakes, it is important to cleanup the housing ends and verify that there are no sharp edges or burs that may interfere with cable travel.  I followed the included instructions from SRAM, along with some advice from the BB7 Setup video, also from SRAM.

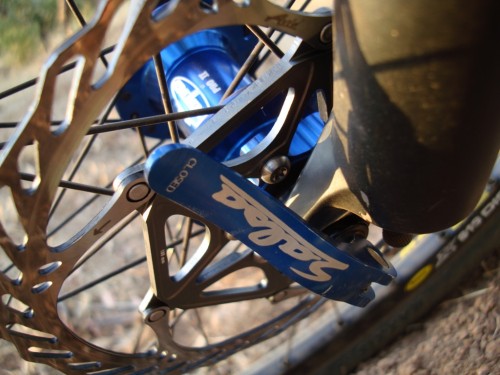
The Cleansweep X rotors are from the new Avid XX disc brakes.  While the two-piece Cleansweep X rotors don’t really have much performance benefit over the standard ‘Rounagon’ rotors, they do look a lot better.  And besides, what good is going to discs if they don’t look cool?  The cool-looking Cleansweep X rotors are mounted with Ti hardware, which is supplied with the rotors, and is also cool.

I kept the Paul’s Love levers.  I really like the feel of the levers, and despite my dissatisfaction with their customer service, Paul’s does make some very nice parts.

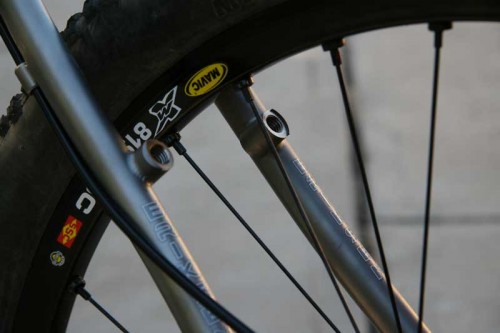
The wheelset uses Mavic XM 819 UST Disc rims, which are similar to the ‘standard’ Mavic XC rim, the XC 717, but add UST tubeless compatibility, 2mm of width, and about 55g per wheel.  While keeping a true and straight rim with discs isn’t as critical as it is with rim brakes, the XM 819 rims do look fairly stout.  As a UST-compatible rim, the XM 819 will require no kits, sealant (supposedly) or anything else if I ever decide to try tubeless tires.  However, I’ll probably try non-tubeless tires with sealant and see how it goes.

The Hope Pro II hubs are also new to me.  I like the reliability of XT hubs and the sound and performance of the Mavic hubs.  Hopefully the Hope hubs will deliver on both of these measures with the added benefit of being very light and very blue.  From what I’ve heard so far, the Hopes will not disappoint in the ridiculously-loud-freewheel department.

The spokes and nipples are from DT Swiss.  The spokes are the light-but-not-too-light ‘Competition’ 1.8/2.0mm variety.  The nipples are DT Swiss Pro-Lock brass and should hopefully make for a strong and reliable wheel.

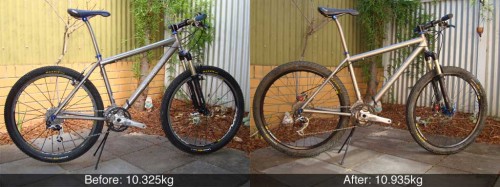
So, now we come to the downside of discs.  Prior to the changes, the UK-14’er weighed 10.325kg (22.76 lbs). With the new brakes and wheels, the weight is 10.935kg (24.1 lbs), with the same tires and standard tubes.  While all of this additional 610g (1.3 lbs) cannot be directly contributed to the disc brakes, the bulk of it can be as the new wheelset (on paper) only weighs about 76g* (.17 lbs) more than the old wheelset.  In addition to the above list of removed part, I also removed the rarely-used Pop-Loc from the fork, which weighed 70-75g (Pop-Loc, cable and housing).  On the bright side, I’m going to try the Larsen TT tires tubeless.  This could save 300-350g (0.75 lbs), but I’m guessing with sealant and valve stems, the weight savings will be closer to 200-250g (0.5 lb).

*-The difference between the two wheelsets is actually 116g, but the XM 819 rims do not use rim tape, which I estimate at 40g.  The Crossmax wheels required rim tape as the inner surface was uneven and punctured tubes.  Crossmax weights are  from Mavic.  The Hope Pro II / Mavic XM 819 UST Disc wheelset weight is from the Speedgoat Custom Wheelset Builder.

For those who are really interested in tables and data, this is for you:

WheelWeight (g)
Mavic Crossmax XL (front)738
Mavic Crossmax ST (rear)915
Mavic Crossmax XL/ST Wheelset1653
Hope Pro II / Mavic XM 819 UST Disc Wheelset1769

Since I just installed everything and really haven’t had a chance to even break-in the brakes, I’m going to leave my riding impressions of the brakes and wheelset for a future post.

2010 TDU: Challenge Tour, Stage 4

Saturday, January 23rd, 2010

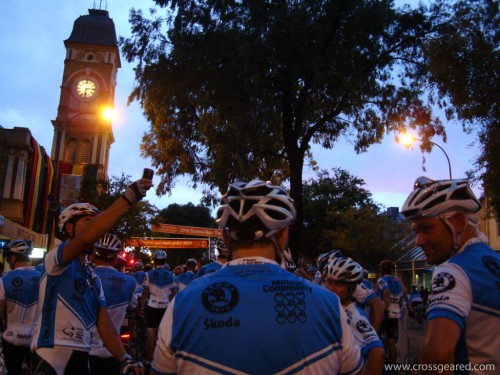
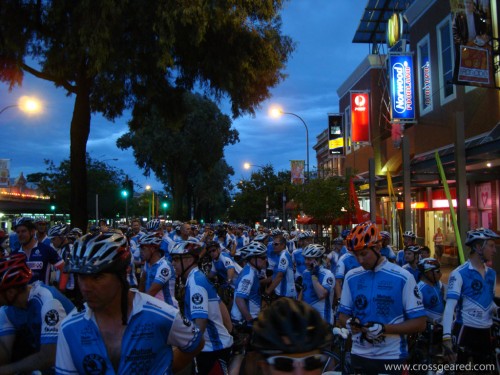
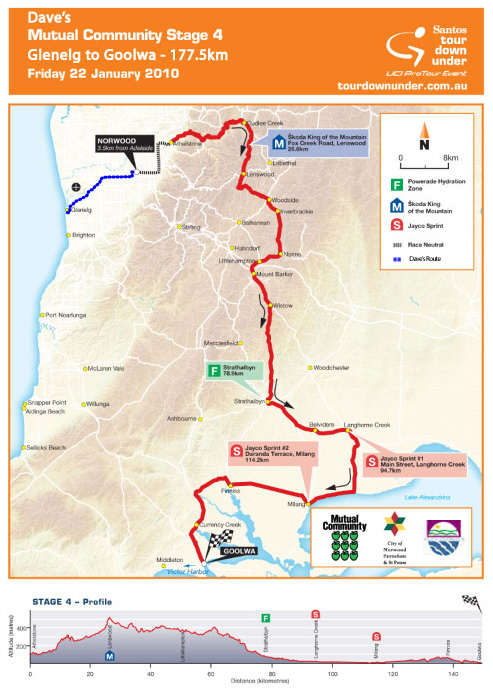
Yesterday I rode in the 2010 Tour Down Under Mutual Community Challenge Tour.  This recreational tour followed the same 160.5km route as stage 4 of the 2010 Tour Down Under.

I started from our home in Glenelg at 5:05AM, and rode about 16.5km to the start in Norwood. The challenge tour started around 6:25AM, and I arrived in Goolwa a little after 1:00pm. In total, I rode 177.6km, with a moving average speed of just under 28kph, and a ride time of about 6:40.  For comparison, Andre Greipel (Team HTC-Columbia), finished the timed 149.5km route first with a time of 3:30:29.

Here you can see my modified Stage 4 route map with the extra leg from Glenelg to Norwood.

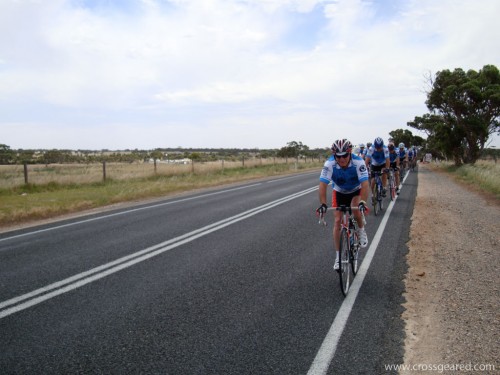
I rode with some fellow mountain bikers for most of the 160.5km.  Riding in a group certainly helped the miles (kilometers?) go by faster, and really helped in the strong crosswinds and headwinds north of Goolwa.

Somewhere on the road outside of Goolwa.

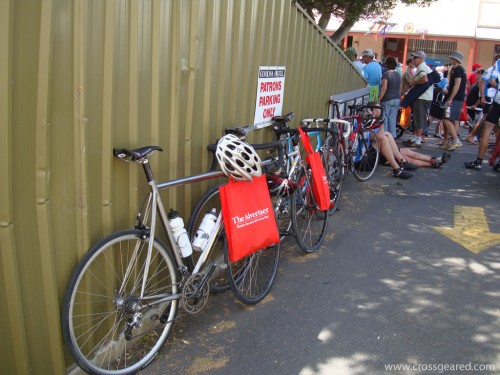
Recovering in the car park outside of a bottle shop near the finish.

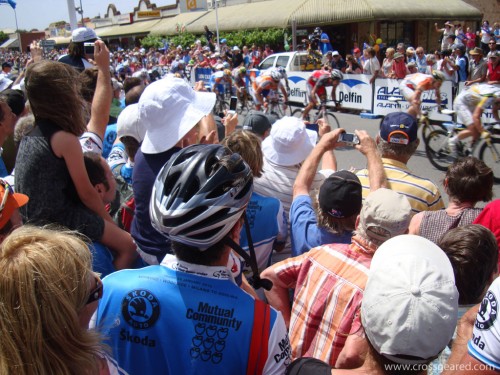
This is as much of the pro-tour finish as I saw.  More photos and video are available from AdelaideNow.

Creative Commons License
www.crossgeared.com is licensed under a Creative Commons Attribution-Noncommercial-Share Alike 3.0 Unported License